

Last Updated: November 1, 2026
Quick Summary
An oak weather bar is a solid timber strip fixed across the bottom of an external door leaf that deflects rain away from the door base and helps stop water creeping in underneath. It must span the full door leaf, sit with at least 5 mm of threshold clearance, and be paired with a seal to stop driving rain and spray.
- Measure the door leaf in three places and use the widest figure to size the bar.
- Allow at least 5 mm of clearance above the threshold so the bar clears the sill.
- Leave a drip gap of around 3-5 mm below the door base so water falls clear.
- Fix a 915 mm bar with three rust-proof screws, outer screws about 50 mm from each end.
- Seal every cut end, screw head and the bar's top edge with exterior-grade sealant.
Table of Contents
- What an Oak Weather Bar Actually Does on an External Door
- Mistake 1: Buying the Wrong Oak Door Weather Bar Sizes
- Mistake 2: Choosing the Wrong Timber for a Hardwood Door Weather Bar
- Mistake 3: Skipping the Weather Bar Seal
- How to Fit a Door Weather Bar Without Getting It Wrong
- Mistake 4: Neglecting Oak Finishing and Ongoing Maintenance
- Mistake 5: Ignoring Draughts and Water Ingress After Fitting
- Choosing Your Oak Weather Bar from Arborfield Joinery
- Frequently Asked Questions
What an Oak Weather Bar Actually Does on an External Door
An oak weather bar is a solid timber strip fixed across the bottom of an external door leaf. It deflects rain away from the door base and helps stop water creeping in underneath. At Arborfield Joinery, we supply these small but vital door accessories.
Here's the thing most guides get wrong: they treat the weather bar as a cosmetic trim. It isn't. It's the first line of defence for your door, your threshold and your hallway floor.
Water Deflection and Runoff, Explained Simply
Water runs down the face of your door. Without a bar, it reaches the bottom edge, sits on the threshold, and finds its way inside. A weather bar interrupts that path.
The principle is simple: a weather bar is a raised, sloped strip that redirects rainwater away from the base of an external door. No slope, no gap, no seal, and the protection fails.
- Deflects rain away from the door base
- Reduces water ingress at the threshold
- Cuts draughts when paired with a seal
- Protects the door's bottom edge from rot
Get this part right and the rest of the job becomes much easier.
Mistake 1: Buying the Wrong Oak Door Weather Bar Sizes
The most common error is guessing the size. A bar that's too short leaves the door ends exposed. One that's too long won't sit flush. And a profile that doesn't match your door thickness will never seal properly.
Check the product listing before you buy, because sizes and profiles vary between bars.
How to Measure the Door Leaf Properly
Measure the full width of the door leaf, not the frame opening. Take the measurement in three places, top, middle and bottom, and use the widest figure. Doors are rarely perfectly square, and a bar cut to the narrowest measurement will leave gaps at the ends.
Then check three things:
- Door width: the bar should span the full leaf, edge to edge, with a few millimetres overhang at each end if the door is exposed
- Door thickness: the bar's rebate must clear the leaf; a 44 mm door needs a different rebate to a 56 mm door
- Threshold clearance: confirm the bar won't catch on the sill when the door swings, allow at least 5 mm of clearance above the threshold
If you're pairing your bar with a threshold strip, our guide to oak door threshold strips walks through measuring the door base for a clean finish.
Choosing the Right Profile for Your Door
Profile choice matters as much as length. A shallow, rounded profile suits a sheltered porch and a traditional door. A deeper, more angled profile, often called a storm or drip profile, throws driving rain further clear and is the better choice for exposed elevations.
Check the rebate depth against your door thickness. A bar designed for a 44 mm door will not sit flush on a 56 mm leaf without packing, and packing creates a water trap.
Checking Compatibility Before You Buy
Before you commit, dry-fit a cardboard template cut to the bar's profile against the closed door. Swing the door through its full arc and watch for contact with the threshold, the frame and any door furniture.
Watch out: ordering before you've measured the actual leaf, rather than the nominal size, is how most returns happen. A door sold as 762 mm can measure 760 mm or 765 mm in practice, and that difference decides whether the bar sits flush or overhangs.
Mistake 2: Choosing the Wrong Timber for a Hardwood Door Weather Bar
Not all timber behaves the same outdoors. A hardwood door weather bar needs a species that holds its shape when wet, then dries without splitting.
Solid oak is the benchmark.
Our advice: match the bar to the door. An unfinished oak bar on an oak door looks right and moves at a similar rate. A mismatched species can swell differently and pull away from the seal.
Mistake 3: Skipping the Weather Bar Seal
A bar on its own deflects most rain. It won't stop driving wind and fine spray.
Skipping it is the single biggest reason doors still leak after fitting. The bar looks right, the water still gets in, and the homeowner blames the bar.
Fit a suitable draught excluder or weatherstripping along the bar's contact edge. Check it compresses evenly when the door closes.
For a deeper look at choosing the right strip, read our guide on how to choose the best weatherstripping for exterior timber doors.
Oak Weather Bars Traditional →
How to Fit a Door Weather Bar Without Getting It Wrong
The trick is preparation: measure twice, seal the cut edges, and don't overtighten.
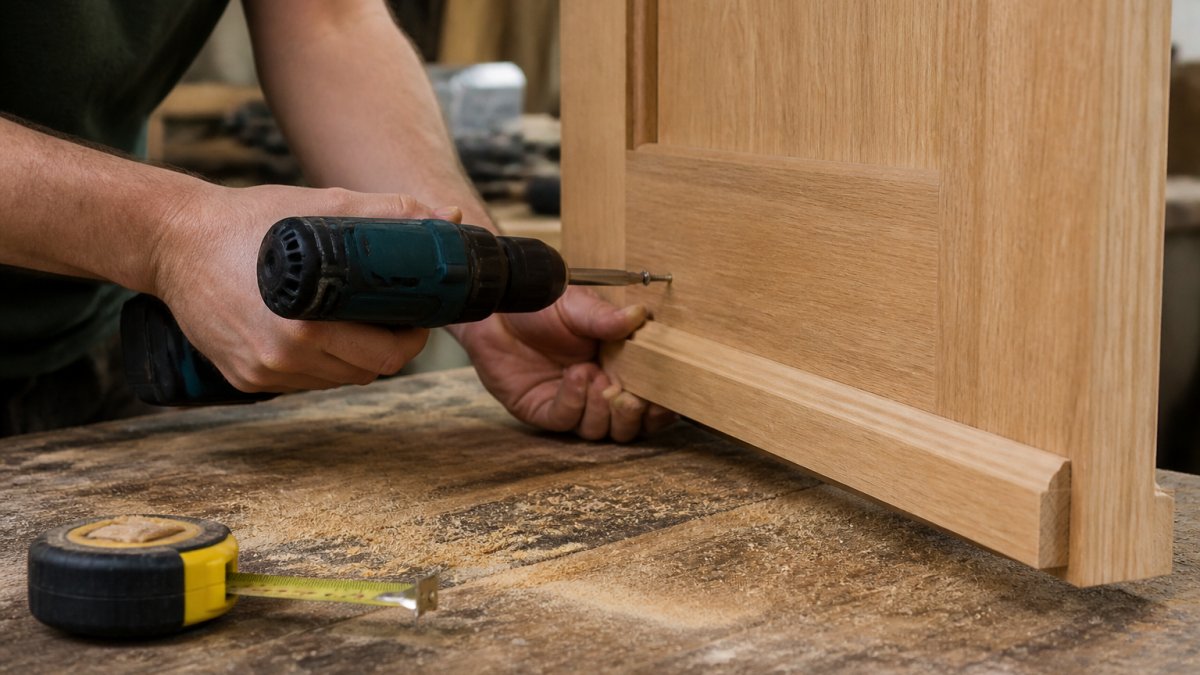
Tools and Materials You Need
- Tape measure, pencil and a small square
- Cordless drill with pilot bits (3 mm for a 4 mm screw)
- Wood screws, rust-proof, stainless steel or silicon bronze, 40-50 mm
- Wood sealant or end-grain preserver
- Weatherstripping or draught excluder
- Sandpaper (120-grit) and a clean cloth
- Cardboard for a template
Step-by-Step Fitting
- Measure and mark the bar against the door leaf. Use the widest of your three width measurements and mark the cut line with a square.
- Cut to length if needed, then sand the cut ends smooth. Seal the cut ends with preserver before fixing, end grain drinks water faster than any other face.
- Dry-fit the bar in place and check the swing clearance. Open and close the door through its full arc and confirm the bar clears the threshold by at least 5 mm.
- Mark the screw positions, typically three fixings for a 915 mm bar, spaced evenly, with the outer screws about 50 mm from each end. Avoid fixing directly above any threshold seal.
- Pilot-drill screw holes to avoid splitting the oak. Drill through the bar only, not the door, unless you are fixing from the inside face.
- Fix the bar with rust-proof screws, snug but not overtight. Over-tightening crushes the timber and breaks the seal.
- Add the seal along the contact edge. Check it compresses evenly when the door closes, if you can see daylight under the door, the seal isn't doing its job.
- Test the door for smooth swing and even compression. Adjust the seal or re-tighten screws as needed.
Expected result: the door closes cleanly, the bar sits flush, and no daylight shows underneath.
Positioning the Bar for Best Drainage
Position matters as much as the fixings. Set the bar so its sloped face throws water forward and away from the threshold, not back towards the door.
A common mistake is fitting the bar flush with the bottom edge of the door. Leave a small drip gap, around 3-5 mm, so water can fall clear rather than clinging to the door base by surface tension.
Sealing the Fixings and Edges
Seal every screw head and the top edge of the bar with an exterior-grade sealant after fixing. Water gets in through the smallest gap, and an unsealed screw hole is a direct route into the timber. Recoat the bar's finish after fitting, especially on any cut or drilled surfaces.
Here are the key fitting figures to keep to hand before you drill a single hole.
| Item | Value | Note |
|---|---|---|
| Threshold clearance | At least 5 mm | Confirm bar clears the sill through the full swing |
| Drip gap below door base | Around 3-5 mm | Lets water fall clear instead of clinging |
| Screw length | 40-50 mm | Rust-proof stainless steel or silicon bronze |
| Pilot bit for 4 mm screw | 3 mm | Drill through the bar only |
| Fixings for a 915 mm bar | Three, evenly spaced | Outer screws about 50 mm from each end |
| Sandpaper grit for cut ends | 120-grit | Sand cut ends smooth before sealing |
Mistake 4: Neglecting Oak Finishing and Ongoing Maintenance
Unfinished oak will grey and take on water if left bare. A finish isn't optional; it's what makes the bar last.
Apply a suitable exterior wood sealant to all faces, especially the end grain, before fitting. Recoat every year or two depending on exposure.
Our guide to the best wood sealants for moisture protection covers which products suit oak outdoors.
A common mistake is sealing only the visible face. Water gets in through the ends and the back, so treat every surface.
Mistake 5: Ignoring Draughts and Water Ingress After Fitting
You've fitted the bar. Water still appears. Wind still whistles. Don't assume the bar has failed.
Nine times out of ten, the fault is elsewhere:
- A gap between bar and threshold
- A worn or missing seal
- A door that's dropped on its hinges
- Water tracking along the threshold, not under the door
Check the seal first, then the door alignment, then the threshold. Fixing a dropped hinge often solves a draught that looks like a bar problem.
If water still gets in after all that, the bar profile may be wrong for your exposure. A deeper, more angled profile sheds driving rain better.
Choosing Your Oak Weather Bar from Arborfield Joinery
We stock two profiles, both in unfinished oak at £19.75. The traditional oak weather bar suits period doors and classic joinery. The contemporary oak weather bar has a cleaner line for modern external doors.


Both do the same job: deflect rain, reduce draughts and protect the door base. The choice comes down to the look of your door.
We've been a family business since 1953, and we're the largest independent stockist in the south. Free UK mainland shipping applies on orders over £900.
Frequently Asked Questions
Do external doors need a weather bar?
Any external door exposed to rain benefits from one. An oak weather bar sits at the bottom of the door leaf and deflects water away from the threshold, so it cannot run back under the door and into the property. Without one, water collects at the base of the door, which is where rot and draughts start. It is a small, inexpensive accessory that protects the door itself, so it is worth fitting on new and replacement external doors alike.
What size oak weather bar do I need?
Measure the width of your door leaf and match the bar to it. Check the door threshold and frame clearance before ordering, and confirm the profile suits your door style. If your opening is non-standard, measure twice and ask the supplier before cutting anything.
Can you cut an oak weather bar to size?
Take the measurement from the fitted door rather than the opening, and leave a small allowance at each end so water drips clear of the frame.
How do you maintain an oak weather bar?
Check the seal along the top edge each season and reapply if it has cracked. Clear away leaves and grit that trap moisture, and sand and re-finish any bare patches promptly. Look for dark patches or soft timber, which signal water has got in, and treat or replace the bar before the door itself is affected.
Small door accessories cause the biggest headaches when they're wrong. If you're unsure which profile suits your door, our team can help you get it right first time. Get started with Arborfield Joinery and fit a weather bar that keeps the rain where it belongs.

Share:
How Do You Choose Stable Timber for Doors?
External Bi-fold Doors for Your Home