
Last Updated: October 30, 2026
Quick Summary
Repairing cracks in solid wood doors means matching the method to the damage: glue and clamp tight splits that close under pressure, use wood filler for wide gaps that stay open, and wood putty for hairline cracks. Work glue into the full depth, clamp with scrap blocks, and leave clamps on for at least 24 hours.
- Run a feeler gauge or paper strip into the crack to judge how deep it runs.
- Tap the door face: a dull, consistent thud suggests a solid wood core.
- Never use filler alone on a split that flexes, or it will crack again.
- Sand filled areas through 80, 120 and 180 grit, always along the grain.
- Draw grain lines into filler on open-grained oak before it dries.
Table of Contents
- Assessing the Crack Before You Touch It
- Solid Wood or Hollow-Core: Know What You Are Fixing
- How to Fill Cracks in Wood: Glue, Filler or Putty
- Preparing and Cleaning the Damaged Surface
- Repairing a Split Wooden Door: Glue, Clamp and Cure
- The Best Filler for Hairline Cracks in Wood
- Sanding, Blending and Matching the Finish
- Repairing Damaged Oak Doors Without a Visible Patch
- Frequently Asked Questions
Assessing the Crack Before You Touch It
Repairing cracks in solid wood doors starts with knowing the damage is rarely just a surface flaw. Before you reach for glue or filler, work out how deep it runs, which way the grain travels, and whether the door is solid or hollow inside.
Most failed door repairs start with a rushed diagnosis. Here is how to read the damage.
Crack Depth, Grain Direction and Location
Run a thin feeler gauge or a strip of paper into the crack. If it stops early, the split is shallow.
- Surface crack: shallow, stable, and a good candidate for filler
- Deep split: reaches the core and needs glue and clamping
- Crack along the grain: usually caused by moisture movement
Check where the crack sits. Cracks near the lock block or hinges carry more stress and need a stronger repair; cracks mid-panel are usually cosmetic.
Grain direction matters too. Wood splits along the grain far more easily than across it.
Solid Wood or Hollow-Core: Know What You Are Fixing
Solid wood doors are timber through the core. Hollow-core doors have a light frame with a cardboard or thin timber honeycomb inside.
Tap the door firmly across its face. A solid door gives a dull, consistent thud.
- Solid wood: can be glued, clamped, sanded and refinished
- Hollow-core: cracks often mean the outer skin has failed, and filling rarely lasts
If you are confirming what you have, or weighing up a replacement, our Kingston Unfinished Oak Internal Door is a solid oak option with a solid high-density PB core and four bevelled panels.

One insider point: many cheap "solid" doors are solid-engineered, a solid core with a veneer face. These repair well, but avoid sanding through the veneer.
How to Fill Cracks in Wood: Glue, Filler or Putty
Matching the repair to the crack is the whole game.
Wood glue is the strongest option for tight splits that close under pressure.
Wood filler suits wider cracks and small holes where the gap will not close.
Wood putty is best for hairline cracks and final touch-ups before finishing.
| Crack type | Best product | Why |
|---|---|---|
| Tight split, closes under pressure | Wood glue | Strongest bond, moves with timber |
| Wide crack, gap stays open | Wood filler | Fills the void, sands smooth |
| Hairline crack | Wood putty | Blends into the surface |
| Crack near hinge or lock | Wood glue plus clamp | Needs structural strength |
Watch out: never use filler alone on a split that flexes.
Preparing and Cleaning the Damaged Surface
A clean surface is what makes the repair hold. Dust, old polish and loose fibres stop glue and filler from bonding.
Clear the crack with a thin blade or a nail, pull out loose splinters and old filler, then vacuum the crack and wipe the area with a cloth. For deeper guidance, see our guide to cleaning wooden frames step by step.
- Remove flaking finish around the crack
- Sand the edges lightly with 80-grit sandpaper
- Wipe away dust with a damp cloth and let it dry
Do not over-wet the wood. Damp timber swells and the crack can close up before you have applied any glue.
Repairing a Split Wooden Door: Glue, Clamp and Cure
Repairing cracks in solid wood doors comes down to three things: get glue into the full depth of the crack, pull it closed with even pressure, and leave it long enough to cure. But first decide whether glue and clamping is even the right method for the split in front of you.
Choose the method by crack size, depth and location
- Hairline crack, under about 1 mm wide, stable when pressed: wood putty or a fine filler, no clamp needed.
- Tight split that closes under hand pressure, along the grain: wood glue and clamps. This is the classic repairable split.
- Wide gap that will not close, or a split with missing timber: filler alone will shrink and crack again. A dutchman (a fitted timber patch) or a professional repair is the durable route.
A split that closes easily with one hand is generally a glue job; one that springs back open may need a different approach. If in doubt, test-close the crack with a clamp before committing to glue.
Kingston Unfinished Oak Internal Door →
Remove, support and clamp safely
Working on a hung door is awkward and risks twisting the frame or damaging the finish. Where practical, lift the door off its hinges and lay it flat on trestles so the crack sits level and gravity helps the glue penetrate.
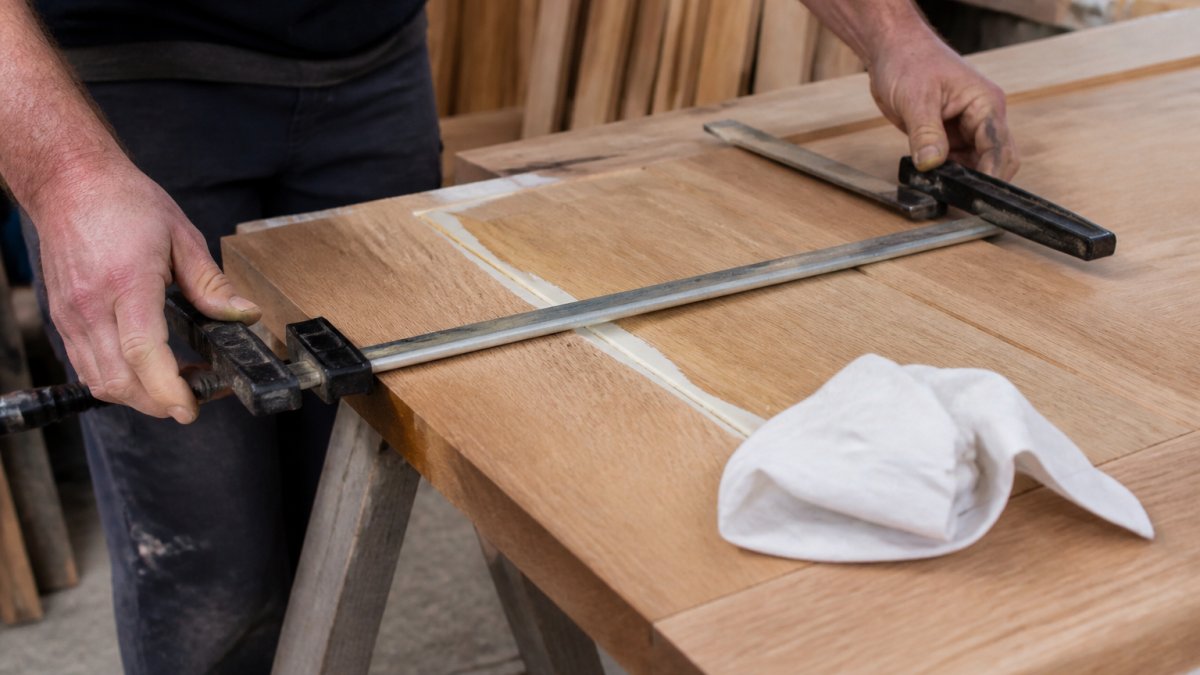
Then work the glue in and clamp it shut:
- Work glue into the full depth of the split with a thin brush, glue syringe or by flexing the crack open slightly and letting the glue run in.
- Place a bar clamp or C-clamp across the crack, with the jaws square to the door face.
- Add a scrap block under each clamp jaw to spread the load and protect the timber and finish.
- Tighten gently until a bead of glue squeezes out along the seam.
- Wipe the excess glue straight away with a damp cloth, then check the door face is flat and not bowed.
- Leave the clamp in place for the full cure time before touching it.
Do not overtighten. Too much pressure starves the joint of glue, forces the timber out of shape and can leave clamp marks that show after finishing.
Curing conditions and realistic timelines
Curing matters as much as clamping, and the time depends on the product, temperature and humidity. Most wood glues reach handling strength in a few hours but need longer for full bond strength; leave clamps on for at least 24 hours and avoid sanding or finishing for a similar period.
- Clamp time: typically 24 hours for a structural split, longer in cold conditions.
- Before sanding: once the glue has fully cured and the seam is hard.
- Before finishing: after sanding and any filling, once the timber is dry.
If the split is near a hinge or lock and the door carries security or weather-seal duties, a glued repair is a holding measure, not a permanent fix. Have the door assessed before relying on it.
The Best Filler for Hairline Cracks in Wood
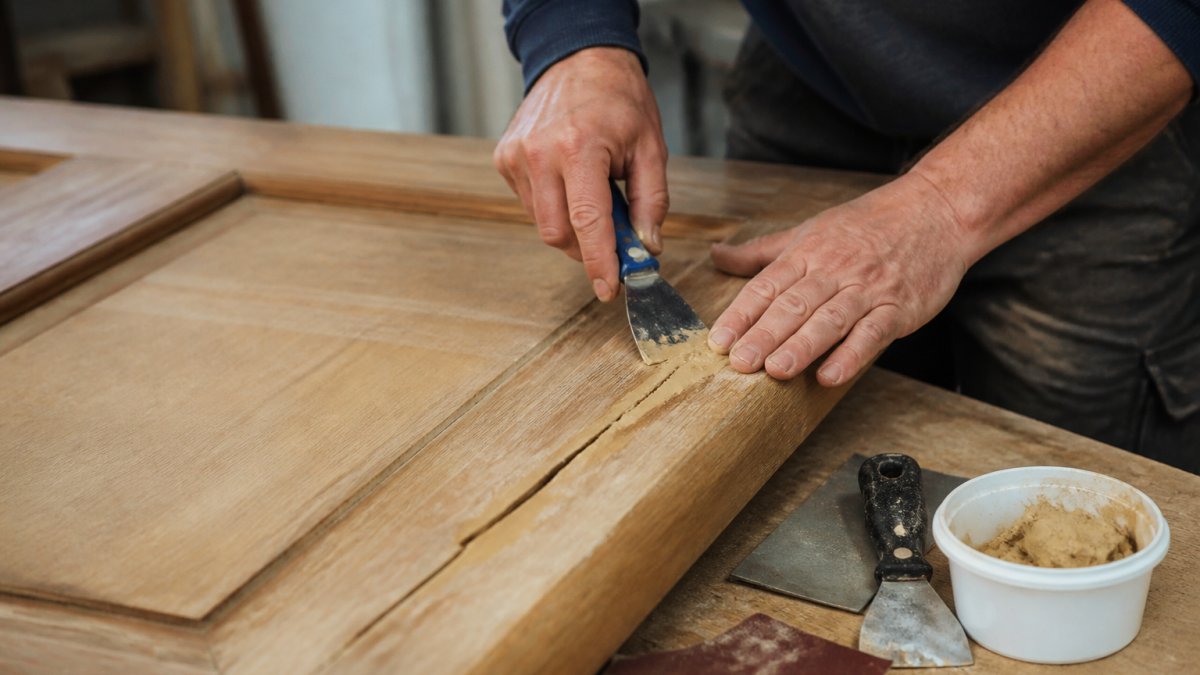
The best filler for hairline cracks in wood is a fine-grained wood putty matched to the door's colour, applied thin and sanded flush.
Hairline cracks are narrow, often less than a millimetre wide. They do not need clamping.
- Choose a putty close to the timber's natural tone
- Apply with a flexible filling knife, pressing into the crack
- Wipe the surface before it sets hard
For oak, pick a putty that matches the grain rather than a generic light pine shade.
Hairline cracks can return if the cause is moisture movement, so keep humidity steady where possible.
Sanding, Blending and Matching the Finish
Sanding is where a good repair becomes invisible, or where it goes badly wrong. Work through the grits in order and always sand along the grain.
- Start with 80-grit sandpaper on filled areas
- Move to 120-grit to smooth the surface
- Finish with 180-grit for a paint or stain-ready face
Keep the sander flat and light. Pressing hard creates dips that show under a finish.
Match stain, grain, sheen and colour
Matching the finish is the step most guides skip, and it decides whether the repair disappears. Work through colour, grain, sheen and texture in order.
- Colour: test any stain on an offcut or a hidden edge first. A close match on a scrap piece is far safer than guessing on the door face. Build colour in thin coats rather than one heavy pass, and let each coat dry before judging it.
- Grain: on open-grained timbers such as oak, draw fine grain lines into the filler or repair with a fine tool before it dries, following the direction of the surrounding grain. A flat patch of colour with no grain reads as a repair even if the colour is right.
- Sheen: match the sheen of the surrounding door, not just the colour. A matt patch on a satin door, or a glossy patch on an oiled door, catches the light and stands out. Test the sheen on a scrap piece and adjust with the same product used on the door.
For unfinished oak, a hard wax oil brings out the grain, as recommended for the Kingston Unfinished Oak door. For pre-finished doors, use a matching stain or lacquer on the repaired patch and blend outwards in thin coats so the edges disappear.
When the finish will not match
Some repairs cannot be made invisible: a large dutchman on a figured veneer, a repair on a door with a patina built up over decades, or a crack that has stained the surrounding timber. In those cases, a deliberate contrast (a visible patch finished honestly) often looks better than a failed attempt at concealment. If the door is a feature piece, have a finisher assess it before you commit.
Repairing Damaged Oak Doors Without a Visible Patch
Repairing damaged oak doors without a visible patch means matching grain, colour and sheen, not just filling a hole.
- Use a filler tinted to the oak, not a neutral one
- Draw grain lines into the filler with a fine tool before it dries
- Blend the finish outwards in thin coats
Where the damage is deep or the door has cracked repeatedly, repair may not be the sensible route.
If replacement makes more sense, our Coventry Prefinished Oak Internal Door is a solid core, pre-finished oak option.

Be honest about the limits. A surface crack repairs beautifully.
Frequently Asked Questions
Can a split solid wood door be repaired without replacing it?
Yes, in most cases. A split that runs with the grain and has not broken through the door's structure can be closed with wood glue and a bar clamp, then sanded and refinished. The repair holds because modern wood glue forms a bond stronger than the timber itself. Replace the door only if the split has separated a lock block, runs across the grain, or the door has dropped and no longer closes squarely in its frame.
What is the best filler for hairline cracks in a solid wood door?
For hairline cracks, a fine surface wood filler or a matching wax stick is generally suitable, and a standard two-part filler can stand out once sanded. Test any filler on an offcut first, and avoid sanding through a factory finish.
How do you make a repaired crack blend in with the door's finish?
Match the finish before you fill, not after. Test your filler or glue-and-dust mix on an offcut or the door's top edge first. Once dry, sand along the grain with 120-grit, then 180-grit, and apply the same product the door already carries. On unfinished oak, hard wax oil emphasises the grain, as recommended for the Kingston Unfinished Oak door. On a prefinished door, work within the existing finish and avoid sanding through the veneer.
When should a cracked wooden door be repaired by a professional?
Call a joiner if the crack runs across the grain, the door has split at a hinge or lock block, or the door no longer sits true in its frame. These point to movement in the opening rather than a surface flaw, and filling alone will fail again within a season. A professional will also tell you honestly whether repair is worth the cost against a replacement door.

Share:
Winder timber staircase kits for different floor heights and layouts
Timber front door security for UK homeowners