
Table of Contents
- What a Door and Door Frame Kit Includes
- Door Lining vs Frame: Which One Do You Need?
- Kit Options Reviewed: Oak, Hardwood and Primed
- Measuring for a New Door and Frame
- Pre-Hung Doorset Installation: Step-by-Step
- Costs, Delivery and Returns
- Common Mistakes and How to Avoid Them
- Frequently Asked Questions
Last Updated: September 11, 2026
What a Door and Door Frame Kit Includes
A door and door frame kit is a pre-manufactured set containing every structural timber component needed to hang a door in a prepared opening. Buying a kit rather than loose timber saves measuring time and guarantees the jambs, head and cill match.

We've supplied these kits since 1953. A typical external kit contains:
- 2 x jambs (the vertical sides of the frame)
- 1 x head (the horizontal top rail)
- 1 x cill (the sloped bottom section that sheds water)
- 1 x cill converter (bridges cill to threshold)
- 1 x draught strip (seals the closing edge)
Jambs, Head, Cill and Draught Strip Explained
The jamb is the vertical member a door hinges onto or closes against. The head caps the opening. A cill only appears on external frames; it slopes outward so rainwater runs off rather than pooling against the threshold. The draught strip sits in a rebate on the closing jamb and compresses against the door when shut.
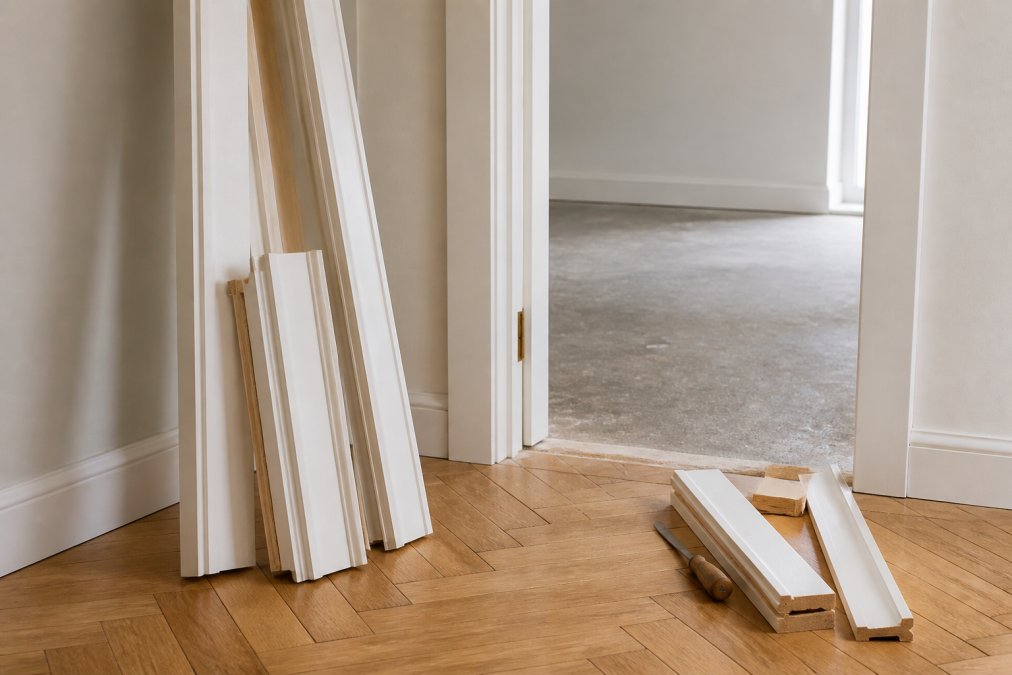
Internal linings skip the cill entirely, the clearest way to tell a lining from a frame.
Door Lining vs Frame: Which One Do You Need?
A door lining is an internal-only frame that covers the wall thickness and carries the door, while a door frame is a load-bearing timber surround designed for external openings and weather exposure. Choose a lining for internal doors, a frame for anything facing the elements.

The two are not interchangeable. An external frame is heavier, includes a cill and weather seal, and is usually oak or hardwood. A lining is slimmer, cheaper, and finished on both faces.
When to Choose a Lining and When to Choose a Kit
Pick a lining for an internal door in a standard stud or brick opening where the wall is already built. Pick a full kit when you need the cill, draught strip and matching head in one delivery, or when the opening is external.
Kit Options Reviewed: Oak, Hardwood and Primed
Oak dominates the external kit market: dense, takes a finish well, and holds its shape through wet winters. Hardwood is the value alternative, and primed linings suit internal doors that will be painted.
| Kit | Material | Best For | Price |
|---|---|---|---|
| Oak External Large 2.8m Door Frame Kit | Oak | Wide openings, double doors | £428.50 |
| Oak External Double Door Frame Kit | Oak | Standard double doors | £364.50 |
| Oak External Single Door Frame Kit | Oak | Single external doors | £294.00 |
| Door Frame & Cill Hardwood (Weather Seal) | Red hardwood | Budget external frames | £118.99 |
| Oak Door Lining | Prefinished oak | Internal doors | £75.00 |
| Oak Fire Door Lining | Prefinished oak | Fire doors | £110.00 |
| Primed Door Lining | Primed softwood | Painted internal doors | £42.50 |
External Oak Kits
The Oak External Single Door Frame Kit at £294.00 is the one most homeowners need, shipping with two 2150mm jambs, a 1050mm head, a cill, a cill converter and a draught strip. For wider openings, the Oak External Large 2.8m Door Frame Kit at £428.50 extends the head to 2800mm.

Internal Linings and Fire-Rated Options
The Oak Door Lining at £75.00 uses crown cut American white prefinished oak with a high-density particleboard core and a removable stop. Where a fire door is required, the Oak Fire Door Lining at £110.00 adds an LP1504 intumescent fire seal. The Primed Door Lining at £42.50 is the budget route for painted interiors.
Measuring for a New Door and Frame
Measuring for a new door and frame means recording the structural opening width, height and wall thickness at three points each, then taking the smallest figure. Brickwork is rarely square, and building to a single measurement is the fastest way to a frame that will not fit.
Take width at the top, middle and bottom, height at both sides and the centre, and wall thickness at each corner. Use the smallest of each set, then allow a small gap for packing and squaring.
Turning Opening Measurements into a Kit Order
A kit is ordered by the structural opening it has to fill, not by the door leaf size. Confusing the two is the most common ordering error.
Work through it in this order:
- Opening width, the clear distance between the masonry or stud faces, measured at three heights. Take the smallest.
- Opening height, floor to underside of the lintel or head, measured at both jambs and the centre. Take the smallest.
- Wall thickness, measured at each corner, because a wall that tapers or has been rendered on one face only will not accept a parallel lining.
- Deduct for packing, allow roughly 10mm across the width and 10mm across the height for wedges and squaring. A frame ordered to the exact opening size will not go in.
- Check the rebate against the leaf, a standard 762mm (2'6") or 838mm (2'9") door leaf needs a frame rebate matching its thickness, typically 35mm or 44mm. Confirm this before ordering.
A worked example: an opening measuring 910mm wide at its narrowest, 2070mm high at its lowest point and 115mm thick points to a frame around 900mm x 2060mm, with the lining depth matched to the 115mm wall. Ordering to the widest reading of 925mm would produce a frame that will not fit without planing.
Measuring an External Opening
External openings add two complications internal linings do not have.
- The cill projects. An external frame's cill sits proud of the wall face so water runs clear of the brickwork. Measure wall thickness to the finished external face, not the inner leaf, or the cill will end up buried in render.
- Threshold height matters. The bottom of the frame must sit above the external ground or paving by enough to keep the cill clear of standing water. Check the finished external level before committing to a frame height, because raising a threshold afterwards is not a small job.
What to Do When the Opening Is Out of Square
Most older openings are out of square by a few millimetres, some by more. The practical test is the diagonal check: measure corner to corner in both directions. If the diagonals differ by more than about 10mm, the opening is significantly out of square and a standard kit will need packing on one side to sit plumb.
Where the difference is larger than that, the sensible options are:
- Build out the reveal with timber or plasterboard to bring the opening back toward square before ordering.
- Order a made-to-measure frame cut to the actual opening rather than a standard kit.
- Accept a wider architrave or casing to cover the packing line once the frame is fixed.
Pre-Hung Doorset Installation: Step-by-Step
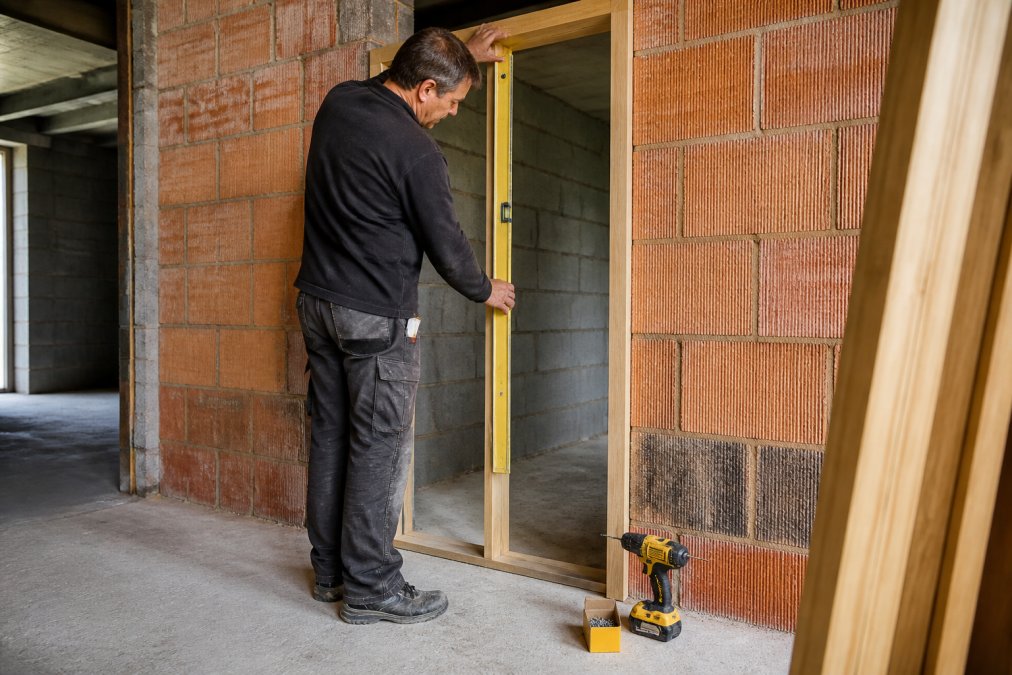
Pre-hung doorset installation is the process of fixing a factory-assembled frame and door into a prepared structural opening, then packing, squaring and securing it.
What You Need Before You Start
- Cordless drill and a bit long enough to reach through the jamb into the wall
- Spirit level, ideally 1200mm or longer
- Packing wedges or shims
- Galvanised or stainless frame fixings, stainless for external oak, because standard steel screws stain oak black over time
- Tape measure and a pencil
- Hammer, chisel and a fine-tooth saw for any trimming
- Suitable external sealant or expanding foam for the perimeter gap
- A second pair of hands
The Installation Sequence
- Dry-fit the frame in the opening and check the head is level. Do not fix anything yet. Confirm the frame sits in the reveal without rocking and that the cill or threshold sits at the right height.
- Pack the jambs at the hinge side until the frame is plumb front-to-back and side-to-side. A frame plumb one way and leaning the other will bind the door.
- Check the diagonal measurements match to confirm the frame is square. Corner-to-corner in both directions should read the same; if they differ, adjust the packing until they agree.
- Fix through the jambs into the wall, not through the face. Screw through the side of the jamb, countersinking so the head sits below the surface. Fixing through the face of a prefinished frame leaves visible screw heads that cannot be hidden.
- Fit the door, then adjust the hinges and strike plate. The door should close against the draught strip with even compression along the closing stile and no binding at the head.
- Seal the external gap with a suitable mastic or expanding foam rated for external use, trimmed back once cured before fitting any trim.
- Fit architrave or casing to cover the fixing line on internal faces, and check the external seal is continuous around the full perimeter.
Work the hinge side first. Squaring from the closing side is where most DIY installations go wrong: the closing jamb has nothing to pull against, so any error shows as a gap at the head or a door that drops as it swings.
Tolerances to Work To
- Plumb: within about 2mm over the full height of the jamb.
- Level head: within about 2mm across the width.
- Diagonals: equal to within about 3mm.
- Perimeter gap: roughly 5mm each side for packing and sealant.
- Door-to-frame gap: a consistent 2-3mm around the leaf, with slightly more at the leading edge to allow for seasonal movement in timber.
Fire Doors and Compliance
Where a door must be a fire door, typically on a garage-to-house opening, or certain internal doors in flats and houses in multiple occupation, the frame or lining must be fitted as part of a tested assembly (gov.uk). That means:
- The lining or frame must be suitable for fire door use and carry the appropriate intumescent seal.
- The door leaf, frame, hinges, closer and any glazing must be compatible as a set (gov.uk). Mixing components from different tested assemblies invalidates the rating.
- Gaps and tolerances are tighter than on a standard door, and the instructions supplied with the tested assembly must be followed (firesafe.org.uk).
- Certification should be retained, as it may be requested at sale or by a building control body.
If you are unsure whether an opening needs a fire door, check with your local building control body before ordering. Getting it wrong means removing and refitting the frame.
Common Installation Faults
- Fixing the frame before checking the diagonals, then discovering the door binds at one corner.
- Over-packing one jamb and bowing the frame, which shows as a gap at the head.
- Using standard steel screws on external oak and ending up with black staining around every fixing.
- Sealing only the visible external gap and leaving the top and bottom of the frame unsealed, which lets water track in behind the render.
- Trimming a prefinished frame to fit rather than correcting the opening first.
Costs, Delivery and Returns
Budget roughly £42.50 to £428.50 for the frame kit itself, depending on material and width. That covers the timber only; hinges, latches, handles and finishing products are separate.
Arborfield Joinery offers free mainland shipping on orders over £900, which matters on multi-door projects where three or four kits push the basket over the threshold.
Common Mistakes and How to Avoid Them
The most expensive error is ordering a lining when the opening is external. A lining has no cill and no weather seal, so rain tracks down the door face and into the wall.
Other repeat offenders:
- Cutting the head to length before checking the opening is square
- Fixing through the face of a prefinished frame and leaving visible screw heads
- Forgetting that fire-rated linings must carry an intumescent seal to comply with building regulations
- Assuming a standard 762mm or 838mm door leaf will fit without checking the frame rebate
Replacing a door frame is a job where preparation decides the outcome, and getting the kit specification right at the point of order saves a return trip and a wasted weekend. Arborfield Joinery has supplied oak frames, hardwood cills and fire-rated linings since 1953, with bespoke sizing for openings no standard kit will fit. Browse the full range of door frame kits and linings, or speak to the team about a made-to-measure frame for a non-standard opening. Get started with Arborfield Joinery and hang a door that stays square for decades.
Frequently Asked Questions
Can I buy just a door frame for a door?
Yes. Single External Door Frames cost £125.00 and each kit contains two jambs, a head, a cill and a plastic water bar. If you only need the internal surround, Oak Door Lining is £75.00 and Primed Door Lining is £42.50, both supplied with a removable stop. Buying the frame on its own suits replacements where the existing door still fits and only the timber surround has rotted or been damaged.
What is the difference between a door lining and a door frame kit?
A door lining is the internal timber surround that a door closes against, usually made from MDF or oak and finished with architrave. A door frame kit is a complete external assembly, including jambs, a head, a cill, a cill converter and a draught strip, built to shed water and seal against the weather. The door lining vs frame choice comes down to whether the opening is internal or external.
How much does it cost to put in a door and frame?
From our range, the frame itself starts at £125.00 for a Single External Door Frame and rises to £428.50 for the Oak External Large 2.8m Door Frame Kit. Internal linings run from £42.50 for primed, £75.00 for oak and £110.00 for the fire-rated oak version.
Are pre-hung door kits easier to install than standard doors?
Pre-hung doorsets arrive with the door already hung in its frame, so pre-hung doorset installation mainly involves plumbing and fixing the whole unit square into the opening. That removes the fiddly work of setting hinges and trimming a door to fit.
Do I need a fire-rated frame for an internal door?
Fire doors are required in certain positions, such as doors between a house and an integral garage or onto a protected escape route. Oak Fire Door Lining costs £110.00 and includes an LP1504 intumescent fire seal, while the standard oak lining at £75.00 does not. Check what your project needs before ordering, as the lining and the door must both be suitable.
Share:
Door Lining Kit: Your Comprehensive Guide to Finishing Internal Doors
Urban Doors: Industrial Chic for Modern British Homes